We make a synthesizer with our own hands
Contents
Synthesizers that are sold in specialized stores are often quite expensive, and many of them have features that not everyone needs.
If you want to save money and are fond of electronics, you can try to make a homemade synthesizer with your own hands.
How to make a synthesizer with your own hands
There are many schemes for manufacturing a synthesizer – from the simplest analog to digital. Today you will learn how to make a polyphonic 48-key synthesizer yourself . The device, which will be discussed, will be built on the basis of a 4060 CMOS logic chip. It will allow you to play chords and notes in 4 octaves . This can be achieved by using 12 frequency generators for 12 tones and 48 tone generators (one for each of the 48 keys).
What will be required
Necessary tools and materials
You will need the following tools:
- soldering iron;
- Screwdriver Set;
- set of screws;
- screwdriver;
- perforator.
As for materials, you need to have a number of necessary components and parts:
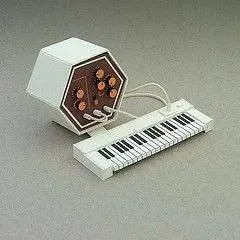
- as a keyboard, you can use the keys from another synthesizer that is out of order, or from a child’s toy;
- a printed circuit board (a dielectric plate on which the circuits of an electronic circuit are located) of a suitable size;
- board for keys;
- a complete set of wires and switches;
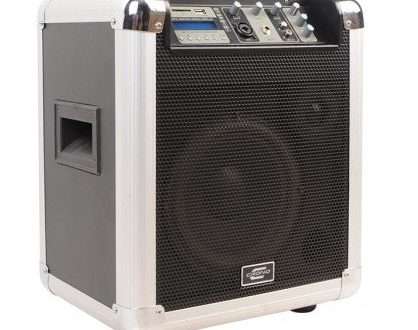
- the case can be made from plastic sheets or you can take parts from a non-working synthesizer a;
- 2 sound speakers;
- a set of necessary radio elements and microcircuits;
- amplifiers;
- external input;
- power supply 7805 (voltage stabilizer; maximum current – 1.5 A, output – 5 V; input voltage interval – up to 40 volts).
- dsP ICs (microcontrollers) that allow you to use additional sound effects.
List of radio elements
A complete set of necessary radio elements:
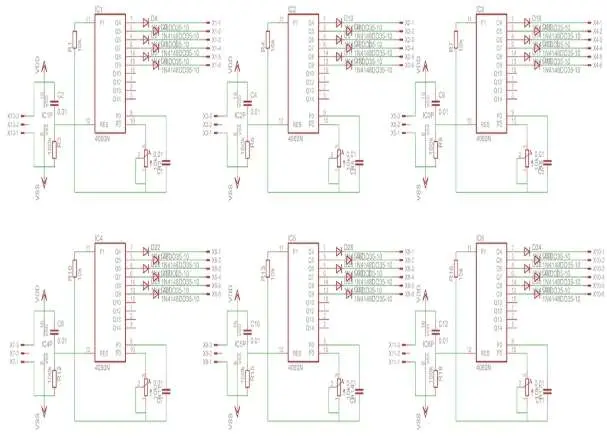
Scheme one . This includes the following elements:
- 4060N chip (IC1-IC6) – 6 pcs.;
- rectifier diode 1N4148 (D4-D39) – 36 pcs.;
- capacitor 0.01 uF (C1-C12) – 12 pcs.;
- resistor 10 kOhm (R1, R4, R7, R10, R 13, R16) – 6 pcs.;
- trimmer resistor 10 kOhm (R2, R5, R8, R11, R14, R17) – 6 pcs.;
- resistor 100 kΩ (R3, R6, R9, R12, R15, R18) – 6 pcs.
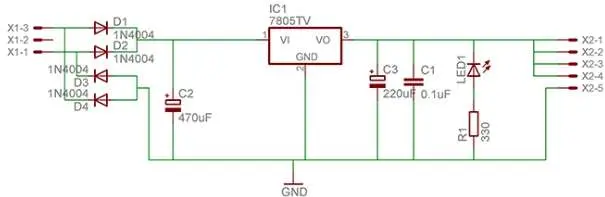
Scheme second . _ Required components:
- linear regulator LM7805 (IC 1) – 1 pc.;
- rectifier diode 1N4148 (D1-D4) – 4 pcs.
- capacitor 0.1 uF (C1) – 1 pc;
- electrolytic capacitor 470 uF (C2) – 1 pc.;
- electrolytic capacitor 220 uF (C3) – 1 pc.;
- resistor 330 Ohm (R1) – 1 pc.
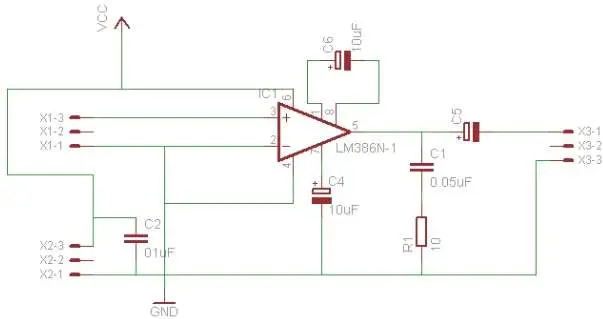
Scheme three . It includes:
- audio amplifier LM386 (IC1) – 1 pc.;
- capacitor 0.1 uF (C2) – 1 pc.;
- capacitor 0.05 uF (C1) – 1 pc.;
- electrolytic capacitor 10 uF (C4, C6) – 2 pcs.;
- resistor 10 Ohm (R1) – 1 pc.
Schemes and drawings
General design scheme:
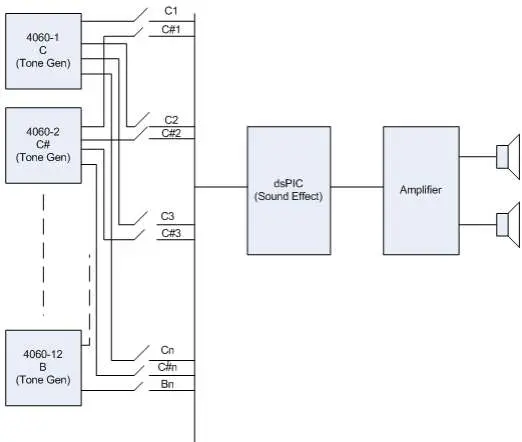
4060 Tone Generators (in this case, a circuit with six output tones)
Power supply 7805
Audio Amplifier LM386
Step-by-step algorithm of actions
- To assemble the synthesizer , you need to perform a series of the following steps:
- Drill 12 mounting holes on the keys.
- Prepare the board for the keyboard. It is necessary to make markings for each key, based on their size, and place the corresponding microcircuits on the board.
- Prepare the printed circuit board by fixing radio elements and switches on it.
- Attach a keyboard board, a printed circuit board and two speakers to the bottom of the case, connecting the necessary wires to all elements.
- Install keyboard.
- Download the gStrings app to your tablet or smartphone. It will allow you to tune the synthesizer to the correct frequency. Since the synthesizer is equipped with a frequency divider, it is enough to tune any one note, and the rest will be tuned automatically.
- The empty space between parts can accommodate dsP IC microcontrollers.
- Fix the top cover.
Your synthesizer is ready!
Possible problems and nuances
Pay attention to the following important points:
- In the presented version, synthesizer a uses a circuit with a six-output tone and a frequency from 130 to 1975 Hz. If you want to use more keys and octaves, you need to change the number of tones and frequencies.
- For those who need a simpler synth without polyphony, the ISM7555 chip is a good option.
- At low volumes, the LM386 amplifier may sometimes produce slight audio distortion. To avoid this, you can replace it with some kind of stereo amplifier.
FAQ (frequently asked questions)
Where can I buy the necessary radio elements?
They can be purchased from various online stores, such as the Ampero electronics store.
Will circuits from an old Soviet synthesizer fit ?
Old radio elements are usable, but in this case, you should not count on good sound quality and the ability to play chords .
Video on this topic
Summing up
It may seem to someone that making a homemade synthesizer is not easy, but this is a very interesting process. And when the first notes sound on this instrument, you will understand that all the efforts were not spent in vain!


You May Also Like
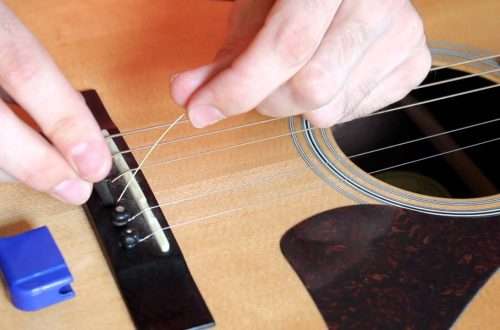
How to correctly replace strings on an acoustic guitar?

What’s the difference between a ukulele and a guitar?