
Learning to play the Balalaika
Tool build. Practical information and instructions. Landing during the game.
1. How many strings should a balalaika have, and how should they be tuned.
The balalaika should have three strings and the so-called “balalaika” tuning. No other tunings of the balalaika: guitar, minor, etc. – are not used for playing by notes. The first string of the balalaika must be tuned according to the tuning fork, according to the button accordion or according to the piano so that it gives the sound LA of the first octave. The second and third strings must be tuned so that they give the sound of the MI of the first octave.
Thus, the second and third strings should be tuned exactly the same, and the first (thin) string should give the same sound that is obtained on the second and third strings when pressed at the fifth fret. Therefore, if the second and third strings of a properly tuned balalaika are pressed at the fifth fret, and the first string is left open, then all of them, when struck or plucked, should give the same sound in height – LA of the first octave.
At the same time, the string stand should stand so that the distance from it to the twelfth fret is necessarily equal to the distance from the twelfth fret to the nut. If the stand is not in place, then it will not be possible to get the correct scales on the balalaika.
Which string is called the first, which is the second and which is the third, as well as the numbering of the frets and the location of the string stand are indicated in the figure “Balalaika and the name of its parts”.
Balalaika and the name of its parts
2. What requirements should the tool meet.
You need to learn how to play a good instrument. Only a good instrument can give a strong, beautiful, melodious sound, and the artistic expressiveness of the performance depends on the quality of the sound and the ability to use it.
A good instrument is not difficult to determine by its appearance – it must be beautiful in shape, built of good quality materials, well polished and, in addition, in its parts it must meet the following requirements:
The neck of the balalaika should be completely straight, without distortions and cracks, not very thick and comfortable for its girth, but not too thin, since in this case, under the influence of external factors (string tension, dampness, temperature changes), it can eventually warp. The best fretboard material is ebony.
The frets should be well sanded both on the top and along the edges of the fretboard and not interfere with the movements of the fingers of the left hand.
In addition, all frets must be of the same height or lie in the same plane, i.e., so that the ruler placed on them with an edge touches them all without exception. When playing the balalaika, strings pressed at any fret should give a clear, non-rattling sound. The best materials for frets are white metal and nickel.
 String pegs must be mechanical. They hold the system well and allow for very easy and precise tuning of the instrument. It is necessary to ensure that the gear and the worm in the pegs are in order, made of good quality material, not worn out in the thread, not rusty and easy to turn. That part of the peg, on which the string is wound, should not be hollow, but from a whole piece of metal. The holes into which the strings are passed must be well sanded along the edges, otherwise the strings will quickly fray. Bone, metal or mother-of-pearl worm heads should be well riveted to it. With poor riveting, these heads will rattle during play.
A soundboard built from good resonant spruce with regular, parallel fine plies should be flat and never bent inwards.
If there is a hinged armor, you should pay attention that it is really hinged and does not touch the deck. The armor should be veneered, made of hard wood (so as not to warp). Its purpose is to protect the delicate deck from shock and destruction.
It should be noted that the rosettes around the voice box, in the corners and at the saddle are not only decorations, but also protect the most vulnerable parts of the soundboard from damage.
The top and bottom sills should be made of hardwood or bone to prevent them from wearing out quickly. If the nut is damaged, the strings lie on the neck (on the frets) and rattle; if the saddle is damaged, the strings can damage the soundboard.
The stand for the strings should be made of maple and with its entire lower plane in close contact with the soundboard, without giving any gaps. Ebony, oak, bone, or softwood stands are not recommended, as they dampen the instrument’s sonority or, conversely, give it a harsh, unpleasant timbre. The height of the stand is also significant; too high a stand, although it increases the strength and sharpness of the instrument, but makes it difficult to extract a melodious sound; too low – increases the melodiousness of the instrument, but weakens the strength of its sonority; the technique of extracting sound is excessively facilitated and accustoms the balalaika player to passive, inexpressive playing. Therefore, the selection of the stand must be given special attention. A poorly chosen stand can degrade the sound of the instrument and make it difficult to play.
The buttons for the strings (near the saddle) should be made of very hard wood or bone and sit firmly in their sockets.
Strings for an ordinary balalaika are used metal, and the first string (LA) is the same thickness as the first guitar string, and the second and third strings (MI) should be a little! thicker than the first.
For a concert balalaika, it is best to use the first metal guitar string for the first string (LA), and for the second and third strings (MI) either the second guitar core string or the thick violin string LA.
The purity of the tuning and timbre of the instrument depends on the selection of strings. Too thin strings give a weak, rattling sound; too thick or make it difficult to play and deprive the instrument of melodiousness, or, not maintaining the order, are torn.
The strings are fixed on the pegs as follows: the string loop is put on the button at the saddle; avoiding twisting and breaking the string, carefully place it on the stand and the nut; the upper end of the string twice, and the vein string and more – are wrapped around the skin from right to left and then only passed through the hole, and after that, by turning the peg, the string is tuned properly.
It is recommended to make a loop at the lower end of the vein string as follows: having folded the string as shown in the figure, put the right loop on the left, and put the protruding left loop on the button and tighten it tightly. If the string needs to be removed, it is enough to pull it slightly on the short end, the loop will loosen and can be easily removed without kinks.
The sound of the instrument should be full, strong and have a pleasant timbre, devoid of harshness or deafness (“barrel”). When extracting sound from unpressed strings, it should turn out to be long and fade not immediately, but gradually. The sound quality depends mainly on the correct dimensions of the instrument and the quality of the construction materials, bridge and strings.
3. Why during the game there are wheezing and rattling.
a) If the string is too loose or incorrectly pressed by the fingers on the frets. It is necessary to press the strings on the frets only those that follow, and in front of the very fretted metal nut, as shown in Fig. Nos. 6, 12, 13, etc.
b) If the frets are not equal in height, some of them are higher, others are lower. It is necessary to level the frets with a file and sand them with sandpaper. Although this is a simple repair, it is still better to entrust it to a specialist master.
c) If the frets have worn out over time and indentations have formed in them. The same repair as in the previous case is required, or the replacement of old frets with new ones. Repairs can only be performed by a qualified technician.
d) If the pegs are poorly riveted. They need to be riveted and strengthened.
e) If the nut is low or has a cut too deep under the country. Needs to be replaced with a new one.
e) If the string stand is low. You need to set it higher.
g) If the stand is loose on the deck. It is necessary to align the lower plane of the stand with a knife, planer or file so that it fits tightly on the deck and no gaps or gaps form between it and the deck.
h) If there are cracks or crevices in the body or deck of the instrument. The tool needs to be repaired by a specialist.
i) If the springs are lagging behind (unstuck from the deck). A major overhaul is required: opening the soundboard and gluing the springs (thin transverse strips glued on the inside to the soundboard and instrument counters).
j) If the hinged armor is warped and touches the deck. It is necessary to repair the armor, veneer or replace it with a new one. Temporarily, to eliminate rattling, you can lay a thin wooden gasket at the point of contact between the shell and the deck.
k) If the strings are too thin or tuned too low. You should choose the strings of the proper thickness, and tune the instrument to the tuning fork.
m) If the gut strings are frayed and hairs and burrs have formed on them. Worn strings should be replaced with new ones.
4. Why the strings are out of tune on the frets and the instrument does not give the right order.
a) If the string stand is not in place. The stand should stand so that the distance from it to the twelfth fret is necessarily equal to the distance from the twelfth fret to the nut.
If the string, pressed at the twelfth fret, does not give a clean octave in relation to the sound of the open string and sounds higher than it should, the stand should be moved further away from the voice box; if the string sounds lower, then the stand, on the contrary, should be moved closer to the voice box.
The place where the stand should be is usually marked with a small dot on good instruments.
b) If the strings are false, uneven, poor workmanship. Should be replaced with better quality strings. A good steel string has the inherent luster of steel, resists bending, and is highly resilient. A string made of bad steel or iron does not have a steel sheen, it is easily bent and does not spring well.
The gut strings suffer especially bad performance. An uneven, poorly polished gut string does not give the right order.
When choosing core strings, it is advisable to use a string meter, which you can make yourself from a metal, wooden or even cardboard plate.
Each ring of the vein string, carefully, so as not to be crushed, is pushed into the slot of the string meter, and if the string throughout its entire length has the same thickness, i.e., in the slit of the string meter it always reaches the same division in any of its parts, then it will sound right.
The quality and purity of a string’s sound (besides its fidelity) also depends on its freshness. A good string has a light, almost amber color and, when the ring is squeezed, springs back, trying to return to its original position.
The gut strings should be stored in wax paper (in which they are usually sold), away from moisture, but not in a too dry place.
c) If the frets are not positioned correctly on the fretboard. Needs a major overhaul that can only be done by a qualified technician.
d) If the neck warped, concave. Needs a major overhaul that can only be done by a qualified technician.
5. Why the strings don’t stay in tune.
a) If the string is poorly fixed on the peg and crawls out. It is necessary to carefully fasten the string to the peg as described above.
b) If the factory loop on the lower end of the string is poorly made. You need to make a new loop yourself or change the string.
c) If the new strings have not yet been fitted. Putting new strings on the instrument and tuning, it is necessary to tighten them, slightly pressing the soundboard with your thumb near the stand and voice box or pulling it carefully upwards. After stringing the strings, the instrument must be carefully tuned. The strings should be tightened until the string retains fine tuning despite the tightening.
d) If the instrument is tuned by loosening the tension of the strings. It is necessary to tune the instrument by tightening, not loosening the string. If the string is tuned higher than necessary, it is better to loosen it and adjust it correctly by tightening it again; otherwise, the string will definitely lower the tuning as you play it.
e) If the pins are out of order, they give up and do not keep the line. You should replace the damaged peg with a new one or try to turn it in the opposite direction when setting it up.
6. Why strings break.
a) If the strings are of poor quality. Strings should be carefully selected when purchasing.
b) If the strings are thicker than required. Strings should be used of the thickness and grade that have proved most suitable for the instrument in practice.
c) If the scale of the instrument is too long, a special selection of thinner strings should be used, although such an instrument should be considered as a manufacturing defect.
d) If the string stand is too thin (sharp). It should be used under the bets of normal thickness, and the cuts for the strings should be sanded with glass paper (sandpaper) so that there are no sharp edges.
e) If the hole in the pegs into which the string is inserted has too sharp edges. It is necessary to align and smooth the edges with a small triangular file and sand it with sandpaper.
f) If the string, when deployed and put on, is dented and breaks on it. It is necessary to deploy and pull the string on the instrument so that the strings do not break or twist.
7. How to save the instrument.
Store your instrument carefully. The tool requires careful attention. Do not keep it in a damp room, do not hang it against or near an open window in wet weather, do not place it on a windowsill. Absorbing moisture, the instrument becomes damp, sticks out and loses its sound, and the strings rust.
It is also not recommended to keep the instrument in the sun, near heating or in a place that is too dry: this causes the instrument to dry out, the deck and body burst, and it becomes completely unusable.
It is necessary to play the instrument with dry and clean hands, otherwise dirt accumulates on the fretboard near the frets under the strings, and the strings themselves rust and lose their clear sound and correct tuning. It is best to wipe the neck and strings with a dry, clean cloth after playing.
To protect the instrument from dust and dampness, it must be kept in a case made of tarpaulin, with a soft lining or in a cardboard case lined with oilcloth.
If you manage to get a good tool, and it will eventually require maintenance, beware of updating and “beautifying” it. It is especially dangerous to remove the old lacquer and cover the top soundboard with a new lacquer. A good tool from such a “repair” can forever lose its best qualities.
8. How to sit and hold the balalaika while playing.
When playing the balalaika, you should sit on a chair, closer to the edge so that the knees are bent almost at a right angle, and the body is held freely and fairly straight.
Taking the balalaika by the neck in your left hand, put it between your knees with the body and lightly, for greater stability, squeeze the lower corner of the instrument with them. Remove the neck of the instrument from yourself a little.
During the game, in no case press the elbow of the left hand to the body and do not take it excessively to the side.
The neck of the instrument should lie slightly below the third knuckle of the index finger of the left hand. The palm of the left hand should not touch the neck of the instrument.
Landing can be considered correct:
a) if the instrument maintains its position during the game even without supporting it with the left hand;
b) if the movements of the fingers and the hand of the left hand are completely free and not bound by the “maintenance” of the instrument, and
c) if the landing is quite natural, makes an outwardly pleasant impression and does not tire the performer during the game.


You May Also Like
What is a Melodika and how to play it?
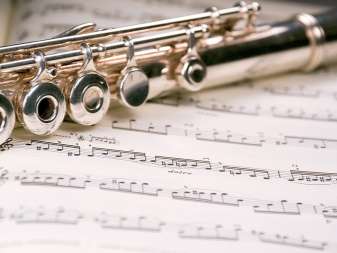
How to play the Flute?