

Right hand on the guitar. Right Hand Positioning Tips with Photos
Contents
Right hand on the guitar. general information
The right hand on the guitar is important for those musicians who want to improve their level and start playing more technically complex pieces. Also, the correct setting significantly facilitates the performance and helps to make friends with the instrument. Discomfort during the game not only slows down learning and even excludes many possibilities, but even pushes away from classes and turns them into an unpleasant duty. Therefore, every guitar lover should know how to competently interact with their favorite instrument.
Why is proper right hand placement important?

General staging rules
Relaxation of the hand
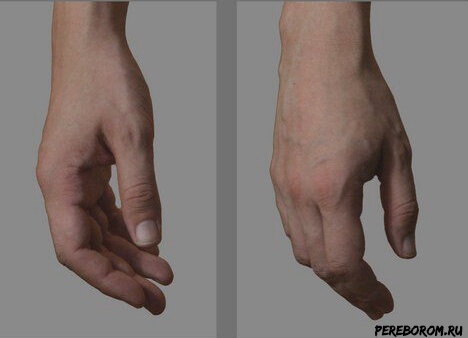
It is important to follow your feelings. Before you try in practice, you need to feel the hand without a guitar. It is best to practice in a chair with a back or sofa so that you can lean on your back. First, relax your arm and lower it along the torso “like a whip.” The muscles are not tense, the posture is as natural as possible. Try to remember these feelings. This will also be useful for left hand guitar. Pay special attention to the shoulder joint – the shoulder does not bulge upward, does not “throw” back and does not go to the side. The hand hangs “in line” with the rest of the hand and is not arched anywhere. The thumb is also “in line”. Fingers slightly bent, bend them a little more, as if squeezing into a fist. Together with the thumb, they form a kind of castle.
Now consider how to hold your hand. Place your forearm on the soundboard and swipe the strings a few times (without playing anything). It is necessary that the shoulder does not tense up and does not “run” during the game. This is a very important point, not observing which will tire not only the arm, but also the back.
Do the same with the elbow. His movements should be kept to a minimum. A common problem for guitarists is playing from the elbow. This is fundamentally wrong, as it adds a lot of unnecessary movements. In addition, at the same time, the elbow gets tired and may even begin to “ache” and hurt. Keep your hand and forearm moving, try to relax your shoulder and not make unnatural movements.
Finger position
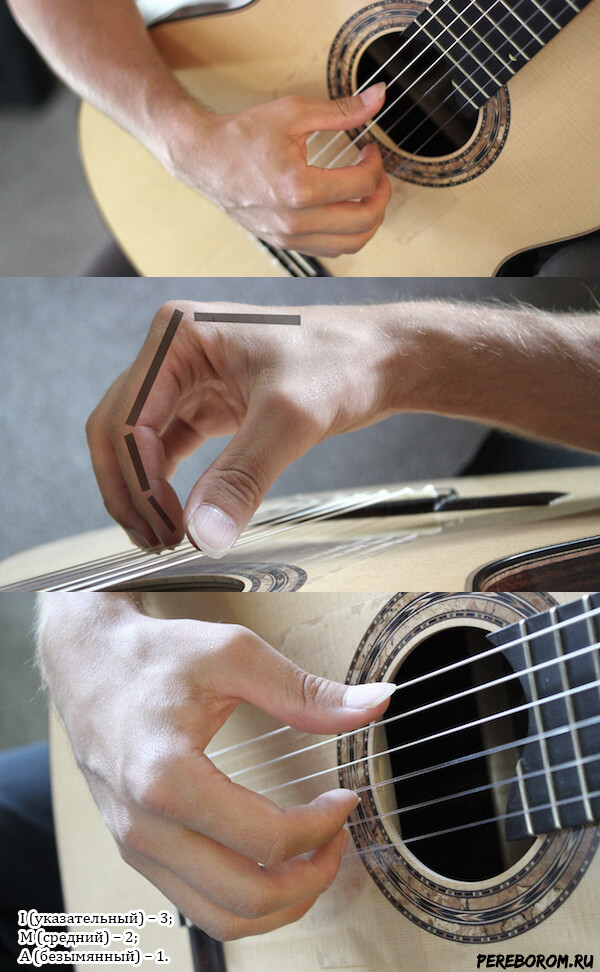
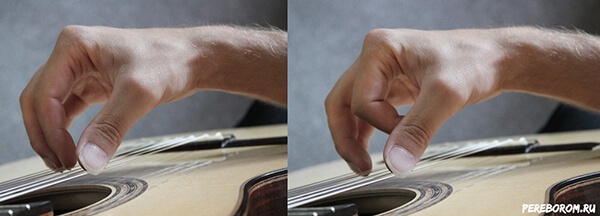
To begin with, the right hand on the guitar rests on the thumb. He seems to “intercept the heaviness” of the forearm. Usually we rely on the 6th or 5th string. This skill is also useful when performing pieces with elements of tirando and apoyando. Next, place the fingers each according to its string.
I (index) – 3;
M (medium) – 2;
A (unnamed) – 1.
Five rules of staging
- Fingers form a semicircle, as if you want to take a small apple. This is a natural position that comes in handy not only in classical, but also when you need to play guitar fight. This is necessary to ensure freedom of movement of the fingers, because. for inexperienced beginners, they are a little tight.
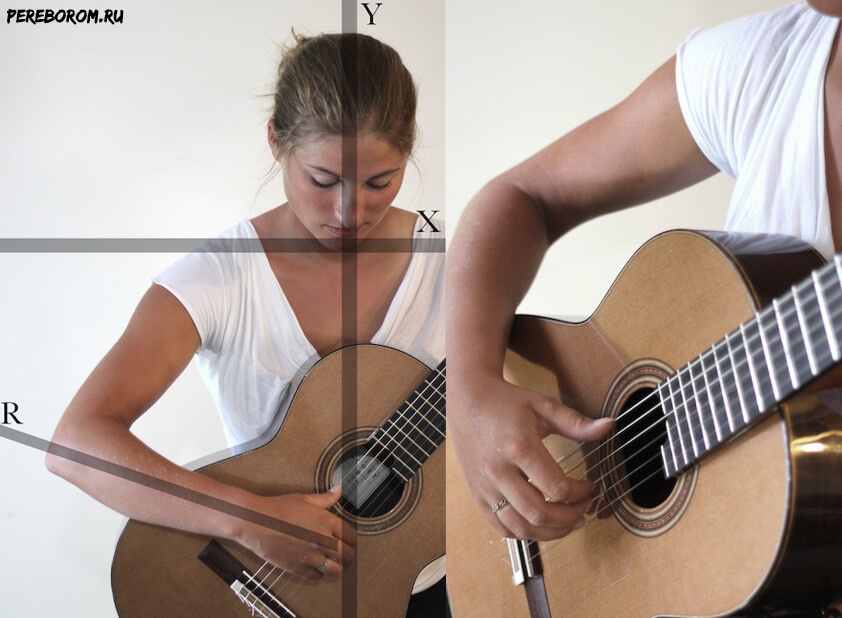
- If you look from the side of the listener (viewer), then the wrist does not bend anywhere – it is straight and continues the line of the hand. It should not be bent either up or down. Consider from the perspective of the guitarist himself. When viewed from above, the brush is either parallel or slightly curved FROM the guitar. It is a mistake if the wrist is pressed against the deck (or tends to lean on it).
- The palm should be parallel to the guitar deck. To check, you can extend your fingers without changing the position of the palm. If it is at an angle, then it will be immediately visible.
- The thumb is slightly closer to the neck than the index finger. “I” should not “be ahead” of “P”, but on the contrary, about 1-2 cm to the right.
- It follows from the previous rule that the middle, index and ring fingers are almost at right angles to the strings.
Right hand on acoustic guitar
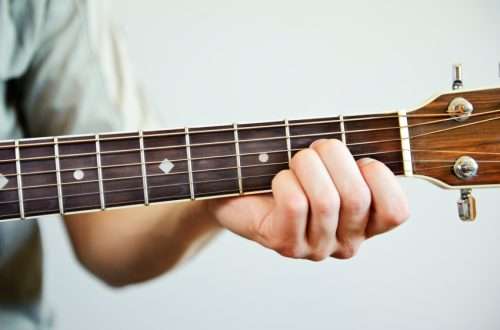
Fighting without a mediator
The game of combat does not imply any strict position. The brush is free, and the fingers are compressed and unclenched according to the work itself. The main thing is that they are free and do not “crash” into the strings. Therefore, keep them about 2-4 cm from the strings themselves.

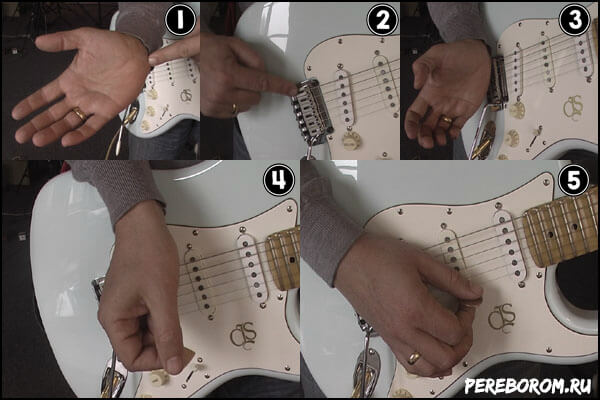
Position with the mediator
On acoustics, the position is quite free, the main thing is that the hand is comfortable. The pick can be held either perpendicular to the deck or slightly at an angle. It is possible that the hand was “in the air”, and also leaned on the stand. Depends on what rhythmic patterns you’re playing.
When playing by bust
Here the initial position is used, when the thumb rests on the bass strings, and the remaining fingers are focused on 1-4. The same technique is used if you play pinch.
Right hand on electric guitar
Bridge play
There is no single advice on how to play the right hand on the guitar. But many experienced musicians advise resting the palm edge on the bridge. This contributes to the muting of the strings and helps to avoid unnecessary dirt when picking up. In this case, you do not need to press, and the palm is relaxed enough.
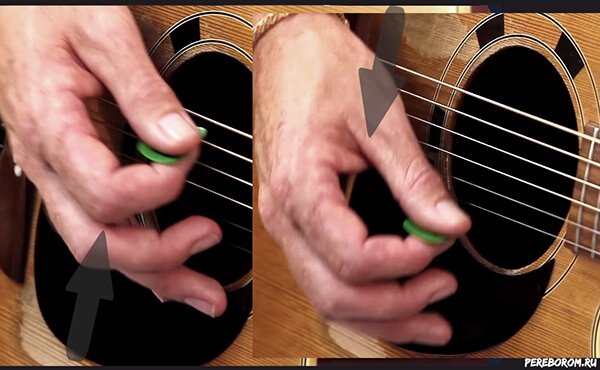
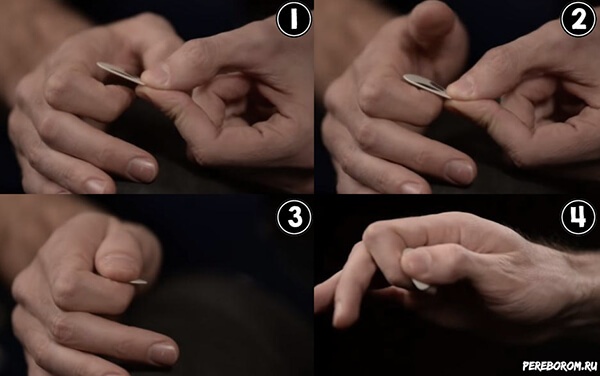
The position of the mediator
The mediator should be taken with the thumb and forefinger. Close the first phalanx “i” and “p” as if you want to take a small thin object like a needle. It turns out that the big one, as it were, lies on the “edge” of the index. Now you can take a mediator between the pads. It protrudes about 1-1,5 cm.
Bass guitar staging
This method does not involve the use of a mediator. Three fingers should rest on the strings (most often it is i, m, a). Big plays 4th. A softer sound is obtained, and freedom of extraction is also provided. But it is not suitable for all genres. In order to achieve a dynamically smooth and rhythmically clear sound, you should use exercises for the right hand on the guitar.

Conclusion
These are the highlights. During the learning of works, additional questions can always arise, since there are hundreds of nuances depending on the complexity and technicality of the song being performed.


You May Also Like

Blatnoy fight and “Three thieves” chords. Detailed diagrams and description.
“Andante” F. Sor, sheet music for beginners