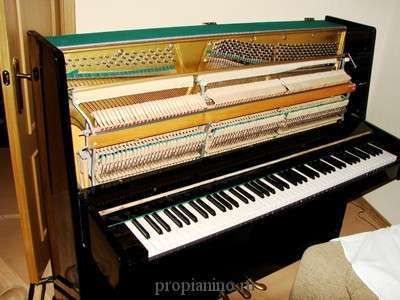
How to disassemble a piano for repair or cleaning
Contents
For cleaning, repairing and adjusting tools, knowing how to disassemble the piano – necessary. It is desirable that the disassembly of the piano be carried out by someone who can then guarantee its assembly and operation, that is, the tuner. However, situations are different. And good advice on how to disassemble the piano will not be superfluous.
Removal of mechanics
First of all, they fold back the top cover, remove the keyboard valve, panels, cirleist. In order to remove the mechanics, the nuts that secure the racks are unscrewed, tilted towards themselves, and, taking the extreme racks, lift and put on two stools. The mechanics are installed in place in the reverse order, for convenience, the pedal sticks are removed. In how to disassemble the piano and then assemble it, it is important not to rush, you need to remove the mechanics carefully, without jerking, trying not to hook the dampers, since putting them in the right position is a long and painstaking process. If, during assembly, the ears were not completely put on the bolts, then it is not necessary to turn the nuts with pliers and break the threads – it is necessary, resting a screwdriver on the ear of the stand near the bolt, and hit the handle with the palm of your hand.
Remove and replace keys

If the mechanics are removed, it is not difficult to remove the keys and put them back in place. When there is a need to pull out one or two keys, and not the entire keyboard, it is not required to remove the mechanics, as well as disassemble the piano. The key is removed from the pins and when the figure is raised up to the stop, the rear end of the key is removed from under the figure. Sometimes the key needs to be turned almost to the vertical position, and in other cases, just a little bit.
Figure – a horizontal intermediate lever having a pusher mounted on the axis – a pin, which transmits movement from the key to the hammer.
Extraction from the piano hammer
First you need to unfasten the bentik, lifting the figure with your finger so that the bentik is not stretched, remove its tongue from the hook, using an upward movement towards you. It is advisable not to drop the screws, otherwise it is impossible to get them out except to disassemble the piano, remove the mechanics and, holding it vertically by the stand, shake it until the screw and washer fall to the floor. In order to prevent the pin from interfering while the hammer is in place, you can remove the key so that the figure lowers along with the pin.
Benthic is a flexible ribbon that connects the hammer knot and the figure.
Spiller – a lever that drives the hammer.
Removing and installing a figure
To remove the figure, you need to unfasten the bentik, get the mechanics, unscrew the screw from the back. Installing the figure in place is more difficult, since the spoon makes it very difficult to install the screw into the socket.
String replacement

Having removed the mechanics, the wrench is unscrewed with a key for a couple of turns. With a screwdriver, pry off the first ring of the string, the end of which is pulled out of the hole in the virbel. Pieces of string can come in handy when looking for a new one. The end of the new string is passed into the hole on the peg and, holding it, turn the wrench, providing a weak string tension. Its turns are pressed against each other with a screwdriver, and the place of inflection with pliers to the wrench.
Virbel – This is a peg that serves to fix the string.
Knowing how to take apart a piano, how to put it back together will come in handy when carrying out the recommended cleaning of the instrument during tuning from time to time. With a certain amount of accuracy and care, no extra parts will remain, nor will subsequent repairs be required.