The order of attaching the effects and the diagram of a simple pedalboard
When we finally get the guitar effects, it’s time to plug them in. There is no problem with one effect, but when we already have several of them, they may sound different depending on the order in which they are attached. I will also share with you some important comments and even one warning, with which I will start.
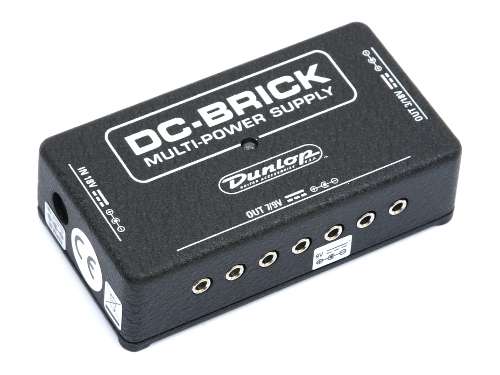
Powering the effects from the mains
The pedalboard is most often powered from an external source, simply from an electrical outlet. There would be no problem if it were not for the fact that different manufacturers use different polarity. We will not delve into it from the scientific point of view, because that is not what this is about. It is enough to apply one rule. If the effect has a plus in the middle, connect it to the power supply which also has a plus in the middle. If the effect has a minus in the middle, connect it to the power supply which also has a minus in the middle. Otherwise you can pin the effect incorrectly connected. When choosing a pedalboard power supply, it is best to choose one that has a branch into two sections due to the polarity. Other ways are to use only effects with one polarity, two different power supplies, or to power all effects from batteries only. All these methods are, to put it mildly, tedious.
Effects loop
Before trying to complete a pedalboard, make sure that our amplifier has effects loops (FX LOOP). Without loops, you can successfully use external distortion, compressor and wah-wah. These types of effects shouldn’t even be connected to it. It is better to attach the remaining effects to the loop. This is, of course, not very necessary, but after all, the effects loop in high-class amplifiers is not for decoration, but has a significant function.
Boosting the amplifier
This is also a topic related to effects. Most often it uses light or medium overdrive or distortion type distortion and the built-in distortion channel in the amplifier. It is best to burn off tube-based amplifiers, because their built-in distortion favors the so-called tube amplifiers due to their tube characteristics. even harmonics. The noise in the cube emphasizes the odd harmonics as well as the distortion built into the amplifiers based on transistors. Only the even and odd harmonics are complemented with the characteristic afterburning effect. How can this be done? At the same time, the distortion channel and external distortion engage. It starts with the “gains” at zero. Both “gains” are slowly raised until a satisfactory distortion is achieved. You can also experiment, stopping both “gains” at a certain safe point and slowly raise only one of them, the other without moving. You should never use both distortions turned full!

True Bypass
It’s best to look for effects with True Bypass technology. Thanks to it, the switched off effect does not affect the signal that flows through it. This is especially important with a long effect loop, when we have several switched on and several switched off effects plugged into the amplifier at the same time, because effects without this technology, even though they are switched off, color the sound.
Order
Let’s move on to the very order of the effects. We distinguish between two “chains”. One between the guitar and the amp’s main input, the other between the effects loop’s send and the effects loop’s return. First connect the filters to the first chain. It sounds mysterious, but the most common filter is wah-wah, so everything is clear. Then we have a compressor, if we have one. This is logical because after filtering it compresses the already pre-processed signal for further clipping. Next we have signal clipping effects. What does that mean clipping? You can also use another, more popular word – distortion. And everything is clear again. All overdrive, distortion and fuzz effects here.

There may be times when some distortion effects don’t work with the duck at this point. Then we plug them in before the wah-wah. Of course, we can also plug in those distortion effects that sound good behind the duck. We’ll just get a different sound then. The second chain, the effect loop chain, starts with modulation effects. They modulate the sound, but do not delay it (at least to a significant extent). So there are effects such as flanger, phaser, chorus, tremolo, pitch shifter and octaver. Finally, we connect delay effects such as delay and reverb. As the name suggests, they delay the sound but do not modulate it (also at least to a significant extent). In practice, we hear the basic sound of the guitar, and then its multiplication or several multiplication in very small intervals (reverb) or larger (delay). Again, this order is logical, because the sound should be “transformed” first and then duplicated. It may sound unnatural to apply modulation effects to already “produced” copies of the sound, and hence the sequence.

How to connect effects to the effects loop?
The cable is led out from the “send” socket in the loop. We connect it to the “input” of the first effect. Then we combine the “output” of this effect with the “input” of the next effect. When we have used all the effects, we plug the “ouput” of the last one into the “return” socket in the loop.

Summation
In the title we have a “diagram of a simple pedalboard”. In fact, there is no such thing, because we connect the effects according to specific rules, so nothing bad can happen if we do not mistake the polarity when supplying. The simplest “pedalboards” are actually multi-effects. It is an alternative to many effects and, at the same time, a cheaper solution. However, do not be afraid to complete a pedalboard consisting of individual effects. It will generate a better sound and, above all, a unique sound. How many guitarists there are in the world, so many ideas for a pedalboard. So let’s not ignore such an important issue.
Comments
tuner always as 1
mm
I plug in a looper before or after tonelab ex?
Kaman
Tuner right behind the guitar. If you don’t have active electronics on your guitar, it acts as a buffer.
Mortifer
And where should the tuner be in all this?
Przemas
Interesting
Nic