Lesson 6
Contents
Here is the final and, perhaps, the most interesting lesson of the course. Here you can finally put the acquired knowledge into practice. For example, choose which musical instrument is best for you to learn, or learn something new about mastering an instrument you already play.
In addition, in this lesson you will find links to books and instructional videos that will make it easier for you to take the first steps in mastering the musical instrument of interest.
We recommend reading about all the instruments, even if you have already decided on your musical preferences. This will broaden your horizons and make it easier to interact with other musicians if you want to play in a band.
Which tool to choose
If you would like to learn how to play an instrument but don’t know which one, learn to play the guitar or violin. In which case it will be much easier to bring them into the underground passage than a piano or a drum kit, so monetization of the skill will be easier from an organizational point of view. This is, of course, a joke. Seriously, the piano is the King of musical instruments. The piano is considered the main type of piano, and it is the piano that is recommended for the initial teaching of music to children.
Piano and Piano
The first piano was assembled by the Italian harpsichord maker Bartolomeo Cristofori in 1709. Today, there are several varieties of pianoforte. These are instruments with horizontal strings inside the body, which include the grand piano and quadrangular piano, and instruments with vertical strings inside the body, which include the piano, piano lyre, piano buffet and other modifications of the instrument.
It is highly desirable to take the first steps in the musical field under the guidance of a teacher. First, you may need the advice or services of a professional to tune your musical instrument. You can check how finely tuned your instrument is by using the Pano Tuner app by allowing the app to access the microphone. This is what it looks like interface applications:
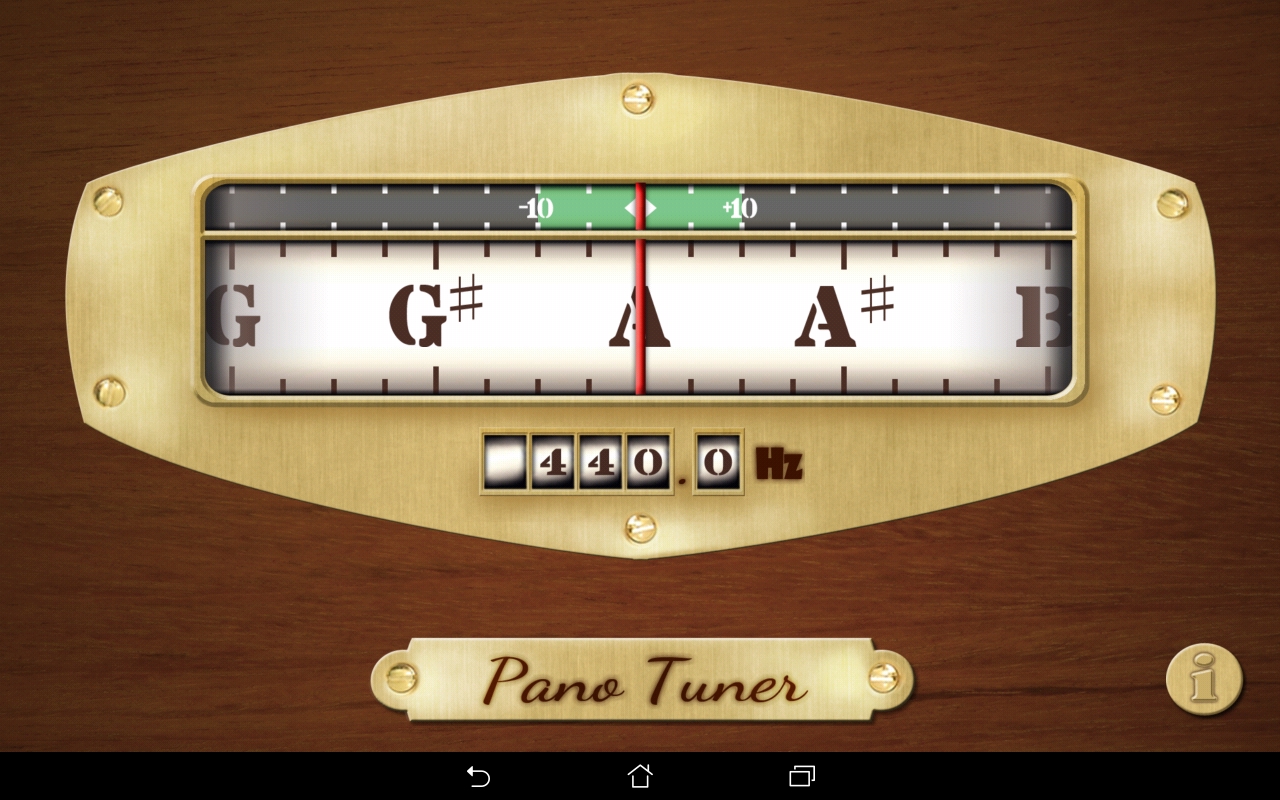
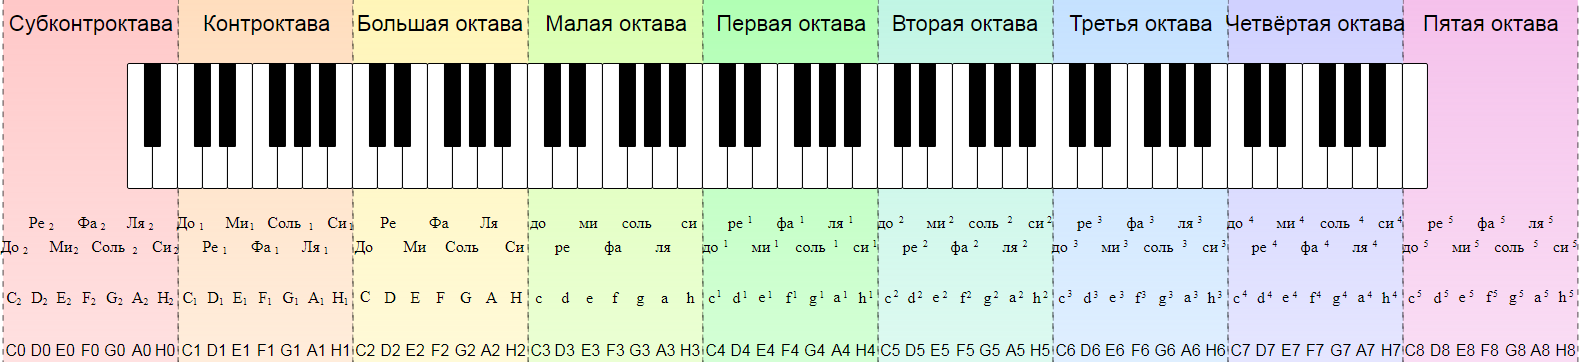
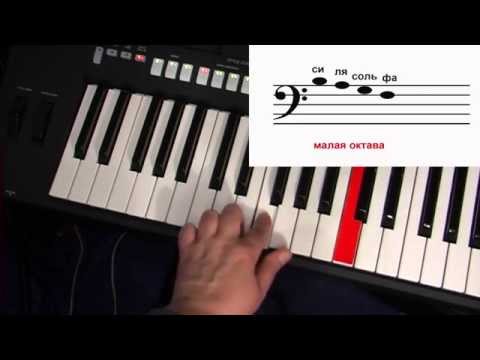
Let us clarify that by default any tuner for musical instruments is preset at a frequency of 440 Hz, which corresponds to the note “la” of the 1st octave. Note-key correspondence is familiar to you from the first lesson, therefore, by pressing any key, you can easily understand whether it is the right note, and the green field above the Latin note designation will let you know if the sound deviation is within the acceptable range or the instrument needs serious retuning . Recall again how the piano keyboard notes:
And the second reason why the initial mastering of a musical instrument should be started under the personal supervision of a teacher. With all the abundance of musical materials on the Internet, as professionals say, they will not be able to “put your hand in absentia” so that you play correctly and do not get tired.
Self-control here is also unlikely to help, because a novice pianist does not always adequately perceive what exactly he should control. Moreover, not all YouTube video tutorials, even very well-prepared ones, pay due attention to hand placement. Or at least they remind you that the hands should be approximately in the position in which it is convenient to hold, but not squeeze the apple.
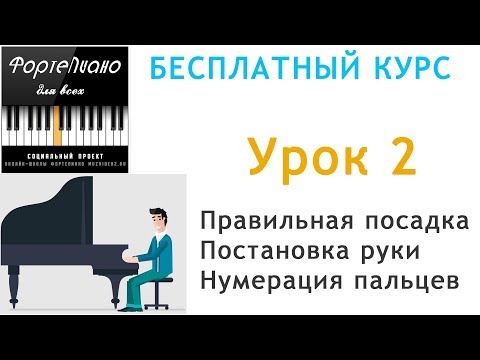
If it is not possible to get to the teacher even for an online lesson, study in advance the tips on the correct fit and positioning of the hands, which are given by the author of the book “Once again about the piano” [M. Moskalenko, 2007]. For clarity, you can study a special lesson on landing at the instrument and setting hands. Interestingly, he comes second in the course, but if you learn it first, I think the author will not be offended:
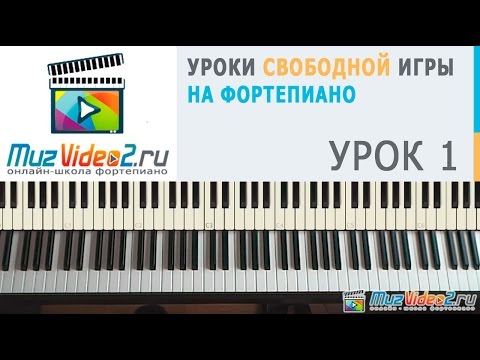
After that, start self-study on the lessons found on the Internet. Considering that you have already almost completed our course on the basics of music theory, you can take on a lesson that immediately suggests starting with building chords. And you can handle this:
In addition, you can recommend for self-acquaintance the “Piano Playing Tutorial”, with which you can adapt the acquired knowledge of music theory in relation to this musical instrument [D. Tishchenko, 2011]. You already know a lot, because. we began a gradual acquaintance with keyboard instruments in the 1st lesson. And if you are at a loss with the choice of what kind of material you should practice your musical skills on, we can advise “Modern Foreign Hits in an Easy Arrangement for Piano” [K. Herold, 2016].
For those who have nowhere to put the piano at home or who would like to master some more modern version of the keyboard sound, we suggest starting to learn how to play the synthesizer.
Synthesizer
In view of the fact that electronic music is in fashion today, and pop and rock bands often use a synthesizer as instrumental support, we suggest getting to know it better. Unlike a conventional piano, a standard synthesizer’s keyboard spans 5 octaves instead of 7. In other words, if the piano’s range is from the contra-octave to the fourth octave, the synthesizer’s range is from the major to the third octave.
If necessary, you can shift (transpose) the key of the keyboard and get at your disposal the missing fourth octave (if transposed up) or counteroctave (if transposed down). The overall sound will remain the same, i.e. 5 octaves, but will cover the range either from the counter octave to the second octave, or from the small octave to the fourth.
There are samples of synthesizers for only 3-4 octaves, but they are not very common and not very applicable in practice. Relatively speaking, the singer Ani Lorak, with her range of 4,5 octaves, would not have had enough of such an instrument even for singing and warming up her voice.
There are many tutorials on the Internet to help beginner musicians. It is better to choose those courses where the material is systematized from simple to complex. The best option is when the training is accompanied by an introductory briefing on how to use the electronic part of the synthesizer and what additional functions, besides actually playing music, are available there. For example, you can take a free course that teaches you how to play and work with the functionality the Yamaha PSR-2000/2100 synthesizer:
There are a total of 8 lessons in this course, covering the basic concepts of music theory in relation to playing the synthesizer, and the exclusive features of synthesizers that most other instruments do not have. For example, synthesizers and digital pianos have an auto accompaniment feature.
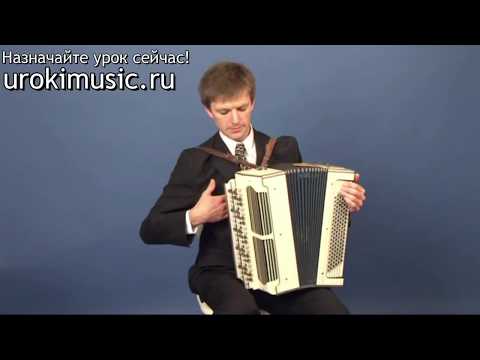
If you want to learn how to play a keyboard instrument, but one that you can take with you to a party or visit, choose an accordion.
Accordion
The accordion is an instrument beloved by many generations of Europeans and Russians. It was invented in 1829 by the Austrian organ maker of Armenian origin Kirill Demyan, and his sons Guido and Karl helped him in this.
For our great-grandmothers and great-grandfathers, he replaced the musical accompaniment of an entire group at dances due to the lack of such in rural clubs. Depending on the model, the left button of the accordion can play bass notes or even entire chords. Actually, this is where the name of the instrument “accordion” came from. The range of the left side of most standard models is from the “fa” of the contra octave to the note “mi” of the big octave.
The keyboard located at the accordion on the right side, i.e. under the accordionist’s right hand, similar to a piano keyboard. The scale of most accordion models starts with the “fa” of the small octave and captures the note “la” of the 3rd octave. The 45-key samples play in the range from “mi” of a small octave, take a note “to” the 4th octave and have a key transposition function. The Bassoon register lowers the range by one octave, the Piccolo register raises the range by one octave.
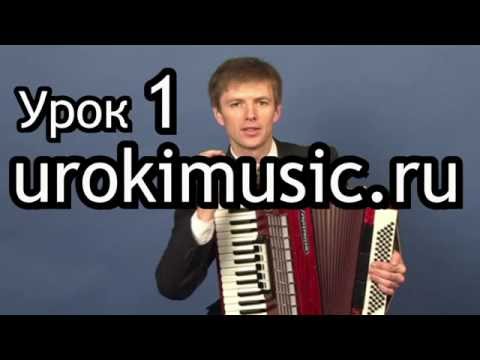
It is better to start learning to play the accordion with a teacher, but if you have some experience with keyboards, you can take on the job yourself. For example, you can see YouTube video tutorials:
And the book “School of playing the accordion” [G. Naumov, L. Londonov, 1977]. If you want to introduce children to this wonderful instrument, we recommend the book “Learning to play the notes: an initial course in playing the accordion for children” [L. Bitkova, 2016].
Accordion
A musical instrument that looks like an accordion, only with buttons instead of keys on the right side, is called a button accordion. The variety of models is quite large: the right side can have from 3 to 6 rows of buttons, the left side – 5-6 rows of buttons. You can get a general idea of how to play the instrument by looking at tutorial video from youtube:
A lot of useful information can be gleaned from the book “Tutorial for playing the button accordion” [A. Basurmanov, 1989]. There are the basics of musical notation in relation to this instrument and melody for self-learning. And we will continue to get acquainted with the most massively demanded musical instruments.
Guitar, electric guitar, bass guitar
Of course, the guitar is one of the most popular and beloved instruments. The guitar can be associated with romance and brutality, blues and rock, courtyard songs and the ubiquitous pop. The forerunners of the guitar – stringed plucked instruments with a resonating body – have been known since the 2nd millennium BC.
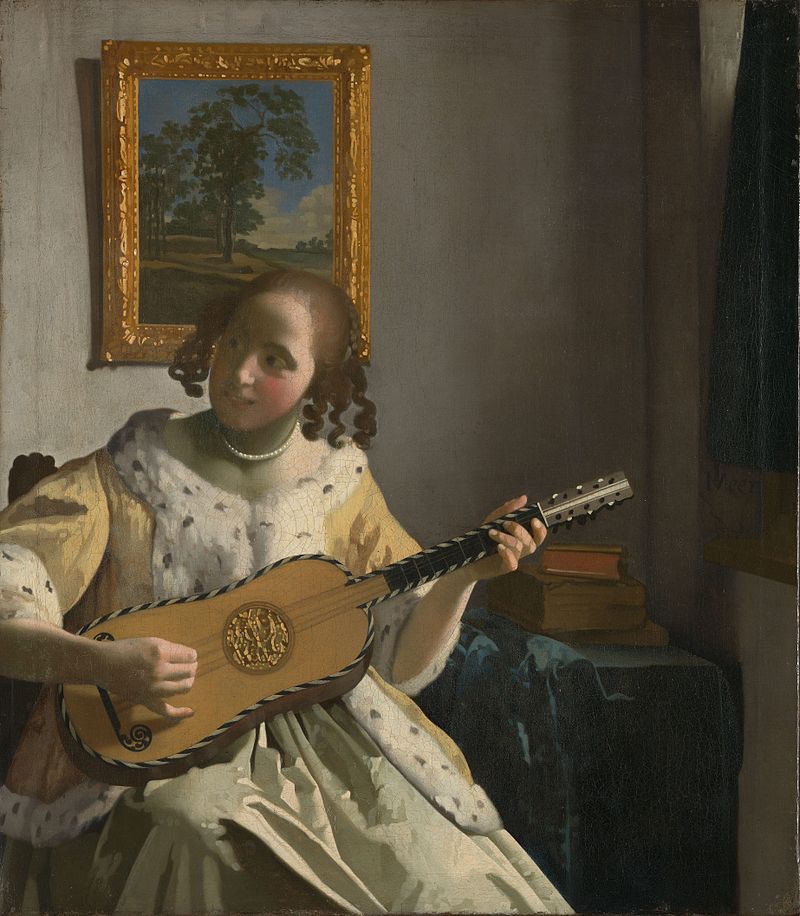
Something similar to a modern type guitar can be seen in the paintings of artists of past centuries. For example, in the picture of the Dutch artist Jan Vermeer “Guitarist”, dated 1672. On the head of the neck, you can see 6 pegs – devices for attaching 6 strings. Here reproduction of this painting:
There are countless models of classical acoustic guitar produced today. Here it is worth making a small clarification. Sometimes there is confusion in terms of what is considered an acoustic guitar and what is classical. In principle, any guitar with a hollow soundboard (body) is an acoustic guitar. This is a classic guitar model. However, the terms are often used to distinguish different types of guitars.
regular guitars without additional sound amplification:
Once again, we clarify that this classification is conditional. In addition to these types, there are electric guitars and bass guitars. The bass guitar is essentially the same as an electric guitar, it uses the same principle of amplification, but different definitions are also used to distinguish.
Guitars with additional sound amplification:
An electro-acoustic guitar visually looks exactly like a regular guitar, but has a hole for connecting to a combo sound amplifier, called a “combo” among guitarists. The traditional 6-string electric guitar is the most common type of guitar. Bass guitar – the same electric guitar, but with a lower (an octave lower) bass sound.
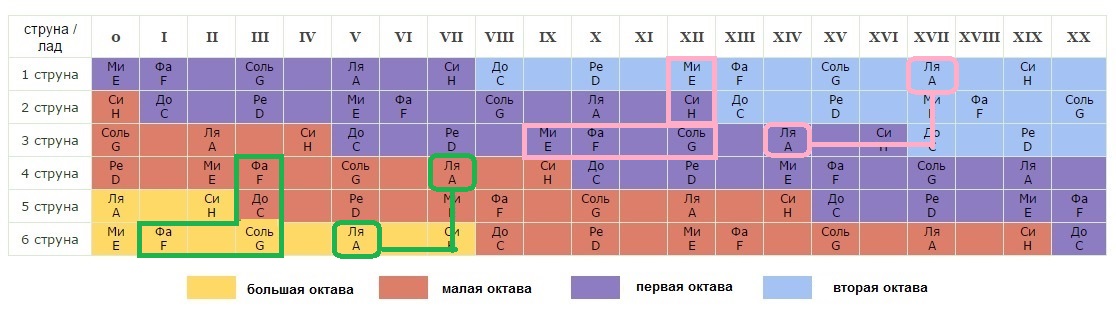
In the context of the sound, a few words need to be said about the guitar tuning. The standard guitar tuning is when 6 strings from the thickest to the thinnest are tuned to the notes E, A, D, G, B, E. You already know that these are the notes “mi”, “la”, “re”, “sol” “si”, “mi”. The difference between the “thick” and “thin” E strings is two octaves. It will be good if you study and remember location of notes on the guitar fretboard:
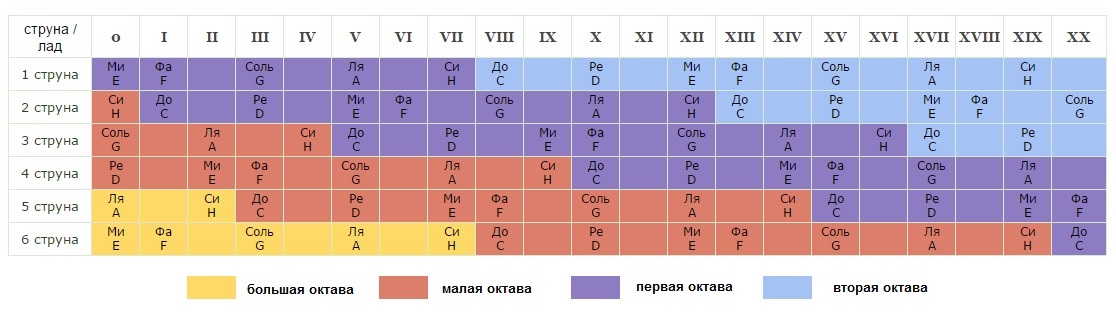
On a bass guitar, the 4 strings from thickest to thinnest are tuned exactly like this to E, A, D, G, but an octave lower than on a conventional electric guitar. The tuning of 5-string and 6-string basses depends on which side the extra string came from. The additional upper (thicker) string is tuned to the note “si”, the additional lower (thinner) to the note “do”. There are samples of basses for 7, 8, 10 and 12 strings, but they are rare, so we will not consider them.
How to memorize guitar notes? This is not difficult, because. the location of the notes on the fretboard obeys the laws. First, a string pressed at the 5th fret sounds on the same note as the open (not clamped) string below it.
In other words, if you press the 6th (heaviest) string at the 5th fret, it will sound on the note “A” in unison with the string below. If you press the 5th string at the 5th fret, it will sound on the note “D” in unison with the open 4th string. The exception is the 3rd string. To get the sound of the 2nd open string, you need to hold the 3rd string at the 4th fret. By the way, the owners of a good ear for music tune the guitar by ear in the 5th fret. For convenience, we have marked this scheme on the picture:
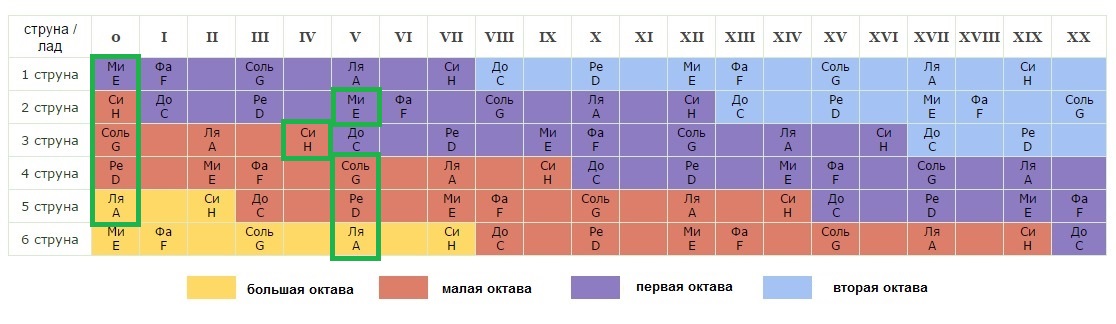
The second pattern is the arrangement of notes with the letter “G”. You can find the same note an octave higher if you retreat 2 frets towards the body of the guitar and 2 strings down. This is a pattern for 4-6 strings. On the 3rd string, you need to retreat 3 frets towards the body and 2 strings down. This is a pattern for 1-3 strings. Explore the following diagram:
Let’s summarize the basic patterns of the arrangement of notes on the guitar fretboard:
Now you know exactly what note each string should sound on at each fret. By the way, it is better to change the strings for new ones before starting lessons, unless your guitar is directly from the store, where they put new strings with you or at least made sure that they “keep the line”. The phrase “keep in tune” means that they can be tuned and a tuned guitar can be played for some time without tuning.
The frequency of subsequent adjustments depends on the manner of playing: the more aggressive the manner, the faster the system goes astray. However, even a week without work requires a recheck of the system and adjustment. And a guitar that has lain on the mezzanine for 2-3 years requires mandatory replacement of strings if you want to get a normal sound.
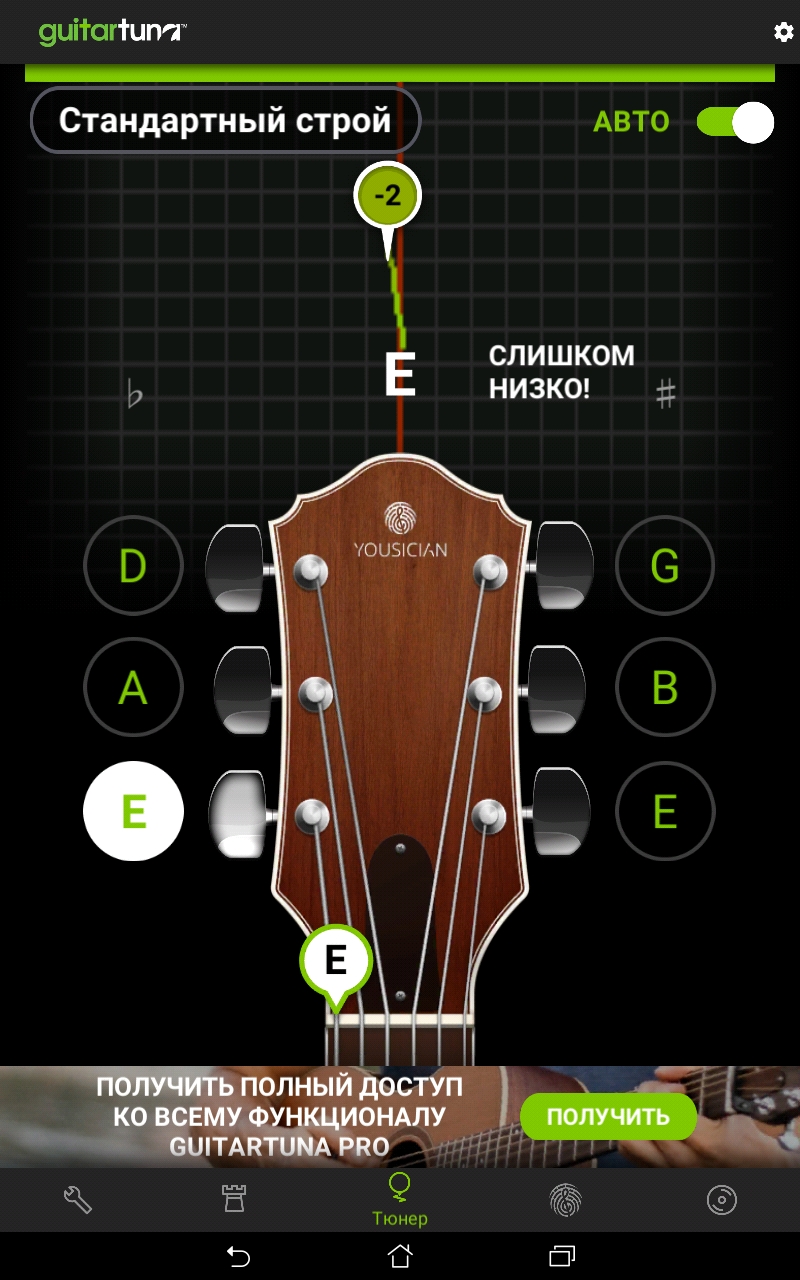
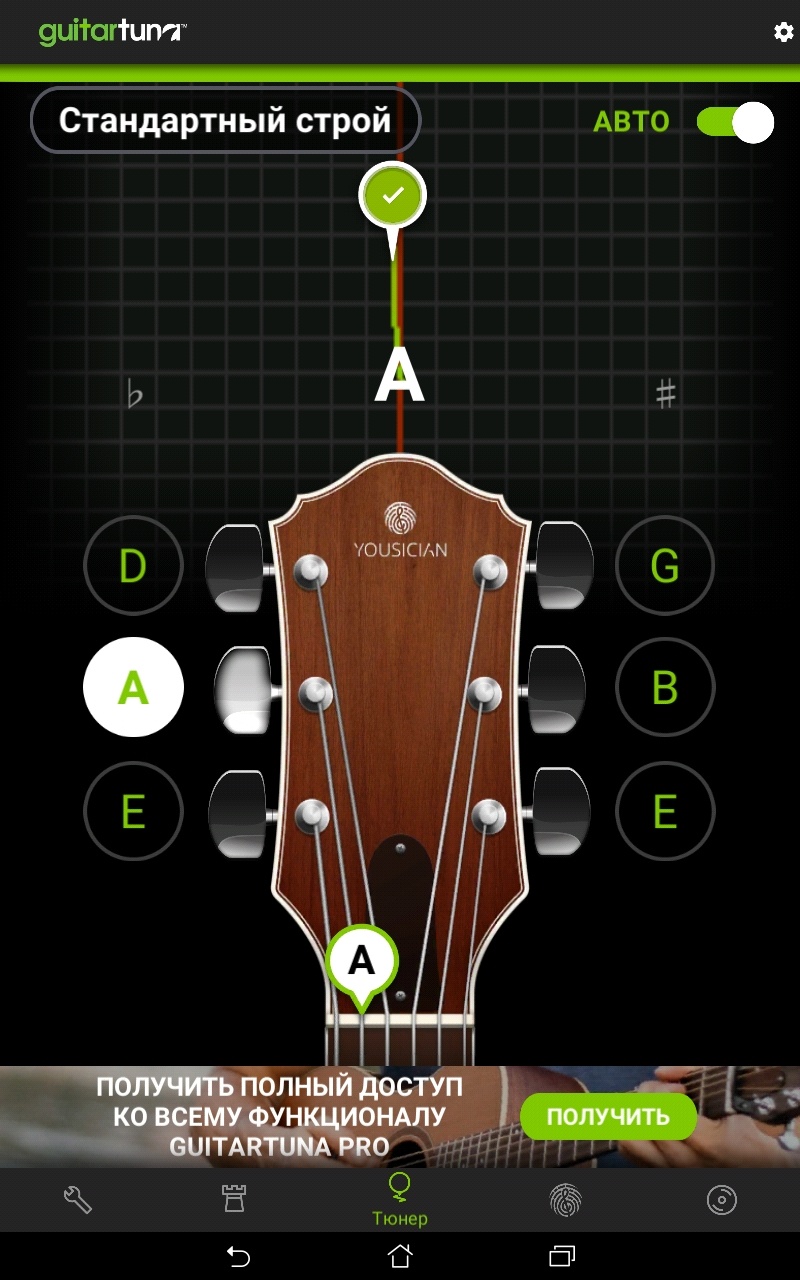
For tuning, you can use the special Guitar Tuna application by downloading it from Google Play and allowing access to the microphone. You just touch the string and wait for the beep, whether it’s tuned to the right pitch or not. At the same time, you can control the tuning process on a scale, where the allowable deviation will be indicated. Looking on the picture below, you immediately understand that the E string on the guitar is not tuned exactly and needs to be fine-tuned:
But the A string is tuned exactly and does not need adjustment:
Fine tuning is done by turning the pegs on the headstock: turn until you hear the fine tune beep and see a check mark on the screen. And now as for the game.
It is better to start learning under the guidance of an experienced teacher, and not just a person who plays better than you. The teacher is aware of how to “place the hand” correctly, and will help to avoid the main mistakes in landing and setting the hands. By the way, the hand should be exactly the same as when playing the piano, how to hold an apple, but squeeze it.
The second key point: the little finger should not “leave” or “hide” under the bar, even if it seems to you that it is more convenient.
And, finally, it is better to devote the first introductory lesson to the work of the right hand, and not to use the left hand in the 1st lesson at all. At least, this technique is followed by many teachers when working with children.
If you prefer to do everything yourself, including learning to play the guitar, on YouTube you can find tutorial video:

Moreover, some teachers sometimes offer a free online course for beginners, however, firstly, pre-registration is required there, and secondly, the offer is usually limited in time. We were once lucky to see a free course “Guitar in 7 days”, but you need to visit this site regularly and maybe you will be lucky too.
From the literature, we can recommend the book “Guitar for Dummies” [M. Philips, D. Chappel, 2008]. For those wishing to master the electric guitar, we can advise the “Electric Guitar Playing Tutorial”, which is accompanied by an audio course [D. Ageev, 2017]. The same author has prepared for you “The Complete Guide to Guitar Chords” [D. Ageev, 2015]. And, finally, for future bass guitarists, the “School-tutorial of playing the bass guitar” [L. Morgen, 1983]. Next, we continue the topic of stringed instruments.
Violin
Another popular stringed instrument, but already from the bowed group, is the violin. The appearance, as close as possible to the modern one, was acquired by the violin in the 16th century. The violin has 4 strings, tuned sequentially to the “sol” of a small octave, “re” of the 1st octave, “la” of the 1st octave, “mi” of the 2nd octave. If you count the intervals, you can see that the difference between the notes of adjacent strings is 7 semitones, i.e. fifth.
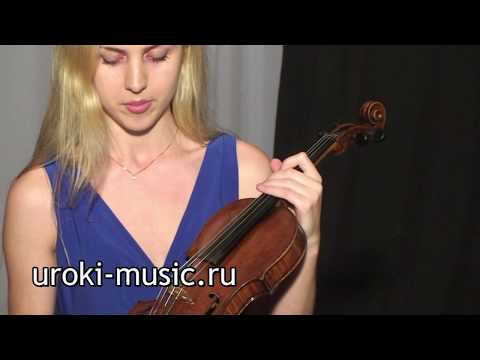
Those wishing to learn to play the violin should start lessons under the guidance of an experienced teacher, because here it is important not only to “put your hands on”, but also to hold the bow correctly and hold the instrument securely on your shoulder. For those who wish to study on their own, we can recommend a series of short lessons of a couple of minutes, which begins with a general getting to know the instrument:
Of the books, the “Violin Playing Tutorial” will be useful [E. Zhelnova, 2007]. In addition, you can read the book “My school of violin playing”, which was written by the famous violinist of the late 19th – early 20th century Leopold Auer and which is still relevant today [L. Auer, 1965]. According to the author, he decided to systematize the most important points for a practicing violinist and share his personal experience.
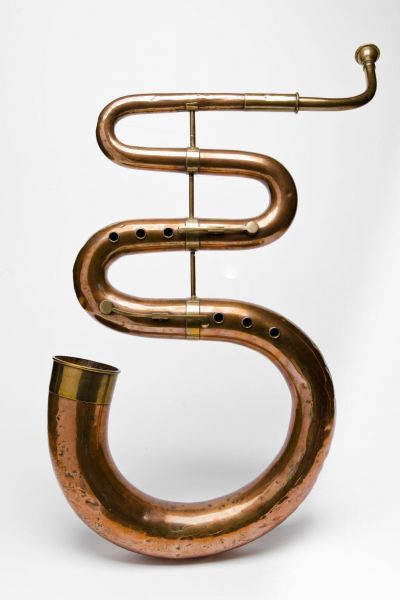
Wind instruments
A large group of musical instruments are wind instruments. Their history goes back over 5 thousand years. Among the ancient peoples, the semblance of a modern trumpet or horn was an affordable way to transmit a signal over long distances, and the first melodies were exclusively utilitarian in nature: by one combination of sounds to notify of a particular event (for example, the approach of an enemy army or wild animals).
Over time, the melodies became more diverse, and the instruments themselves too. Today there are quite a lot of them, and there are even several classifications that allow clarifying their fundamental differences. So, how do they differ?
Classification by primary source of fluctuations:
The second important classification for wind instruments is the classification according to the material of manufacture, because. the sound properties and the available method of controlling the air flow largely depend on the material.
Classification by material of manufacture:
The complexity of the device of reed instruments determines the need to use different materials. So, saxophones are made of an alloy of copper and zinc, sometimes with the addition of nickel, or of brass. The body of the bassoon is most often made of maple, and the S-shaped tube on which the reed is mounted is made of metal. Oboes are made from ebony and, as an experiment, from plexiglass, metal, a mixture of ebony powder (95%) and carbon fiber (5%).
In addition, the category of brass instruments has its own own classification:
As you can see, there are a lot of wind instruments, and they are all very diverse, so it would take a separate lesson to talk about each. We decided to focus on the most popular wind instrument – the trumpet – and found for you learning materials:
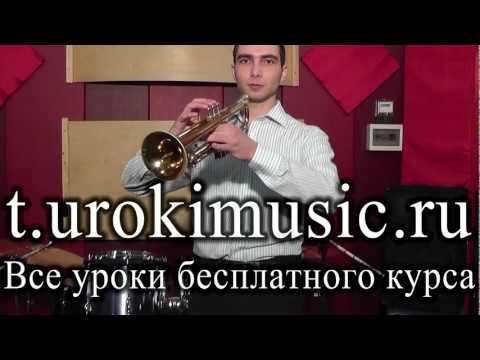
From the literature, we recommend to future trumpet players the book “Elementary school of playing the trumpet” [I. Kobets, 1963]. Now let’s move on to another group of tools.
Percussion instruments
It can be unequivocally said that drums are the oldest musical instruments of mankind. In principle, even just hitting a stone at one tempo or another creates some simple rhythmic line. Almost all nationalities have their own national percussion instruments made from materials widely available in their places of residence. It is impossible to remember them all, and there is no need. But it can be classified according to different criteria.
Pitch classification:
Sound classification:
Idiophones are either metal or wood. For example, wooden spoons.
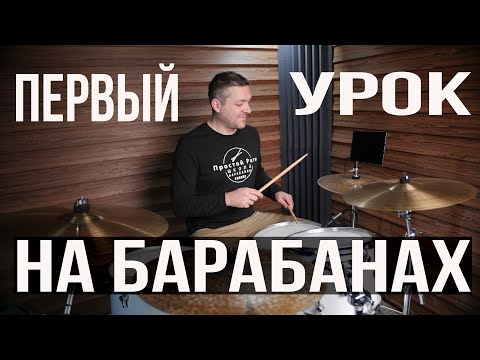
But perhaps the most popular in modern music is the drum set. Types of assembly and packaging can be very different, which largely depends on the style of music in which the musicians play. However, before experimenting with different combinations of components, you need to find out what can be included in the kit.
Basic equipment of the drum set:
| ✔ | Bass drum, aka “barrel” and bass drum. |
| ✔ | Small lead drum, aka snare drum. |
| ✔ | Tom-toms – high, medium, low, it is also floor. |
| ✔ | A ride cymbal that makes a sonorous short sound (ride). |
| ✔ | A crash cymbal that produces a powerful hissing sound (crash). |
| ✔ | A pair of cymbals strung on a rack and moved by a pedal (hi-hat). |
| ✔ | Auxiliary equipment – racks, pedals, drum sticks. |
For ease of perception, first let’s see what the drum kit looks like from above. Black in the picture indicates the seat for the drummer. Tom-toms are labeled as small, middle, floor:
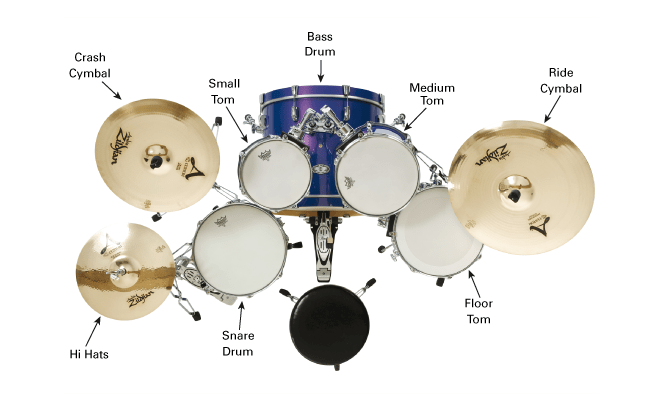
Sometimes in the description you can find the words “alto” and “tenor” instead of the designations “high” and “middle”. Sometimes both drums – high and middle – are called altos. Don’t be fooled by this – each element of the kit has its own sound and its own function, which will become clearer when you start learning to play. See what the drum kit looks like assembled:
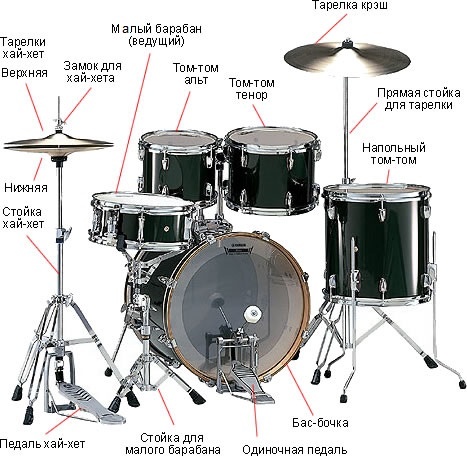
Start learning optimally with mastering games on the basic installation, i.e. 5 drums + 3 cymbals. As you learn, you yourself will come closer to understanding what you need:
From the literature, the book “Percussion Instruments for Dummies” [D. Strong, 2008]. The “School of playing the drum set” will help you get used to the drums in more detail [V. Gorokhov, 2015].
So, we got an idea about the most popular musical instruments. Many people often have a question: what is the largest musical instrument in the world? Formally, this is the organ of the Boardwalk Concert Hall in the United States. Formally, because we are mainly interested in working models, and this body has been silent for the last two decades.
However, the scale of the structure is still impressive. So, the pipe reaches a height of 40 meters, and the instrument itself is included in the Guinness Book of Records in 4 categories: the largest instrument, the largest organ, the loudest (130 dB) and the only one in the world operating under a pressure of 100 inches or 2500 mm ) water column (0,25 kg / sq. cm).
To learn how to sing at least simple songs is within the power of absolutely every person, with the exception of the deaf and dumb. You can see this for yourself if you take our free course “Voice and Speech Development”. By the way, we advise you to go through it, even if you are not going to sing. Your voice during public speaking and in everyday communication will sound noticeably more beautiful.
In the meantime, we recommend that you take another verification test of this course and be sure to use the knowledge gained in the near future!
Lesson comprehension test
If you want to test your knowledge on the topic of this lesson, you can take a short test consisting of several questions. Only 1 option can be correct for each question. After you select one of the options, the system automatically moves on to the next question. The points you receive are affected by the correctness of your answers and the time spent on passing. Please note that the questions are different each time, and the options are shuffled.
And finally, you will have a final exam on the material of the entire course.


You May Also Like
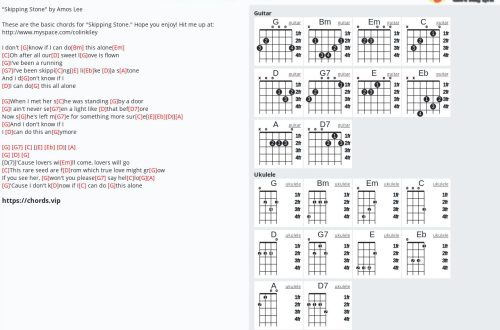
Skipping chords

Brevis: musical educational program